I love challenges and I like them big. When I started building my Velvet Crowe cosplay from Tales of Berseria, I decided to make a giant hand that moves so I could imitate her giant werewolf demonic hand. Of course, I could have made a cardboard hand that would have looked impressive but it wasn’t enough for me. I wanted movement. Therefore, I started researching and I came up with a way of making it work.

Before I started this big project I researched all the internet and worked out mechanisms and materials which where lightweight, affordable and easy enough to find. Finally I opted on a string mechanism that I could pull with my fingers and I used foam for most of my construction. Lots of patience, trial and error and my giant claw came to live.
The first drafts


Before you start building your prop, make sure to have a plan for it. This step is very important as it will save you time and materials later on. After several sketches, I opted for this pattern which was slightly bigger than my own hand but still proportionate. Then I made notes on where I would install the “joints and tendons” (in red and yellow) and the support mechanism where my hand would sit (the support in green and the rings to pull the tendons in blue).
The core structure
When you are making a giant hand you need to make sure you have enough space for your hand in the inside. In my case, my hand is not visible from the outside and it needs to sit comfortably in the inside. I made a handle to grab my hand with 10mm foam. Obviously, foam is very flimsy so I reinforced it with. My solution was reinforcing it with worbla. Covering it with this material I made sure the core wouldn’t collapse when I pulled the strings.


In order to reach the strings that would make my hand close, I made rings that would fit my fingers later on. You can grab these rings inside of your giant hand and pull at them easily. I used plastic tubes to create the base of my fingers. Then, I marked the joints imitating the ones in my hand


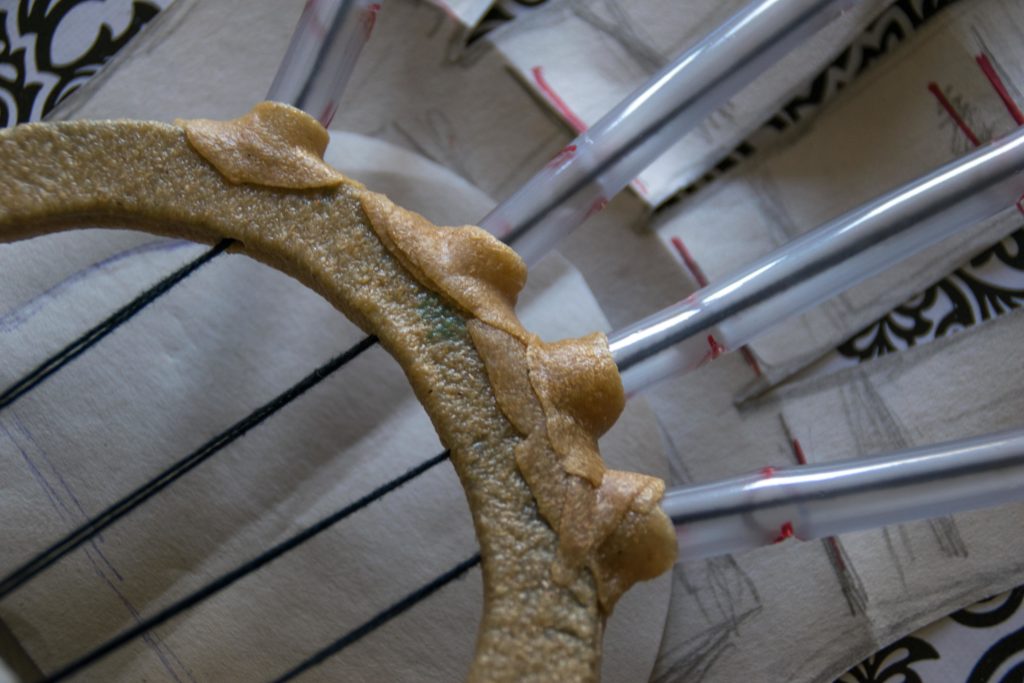
The string mechanism
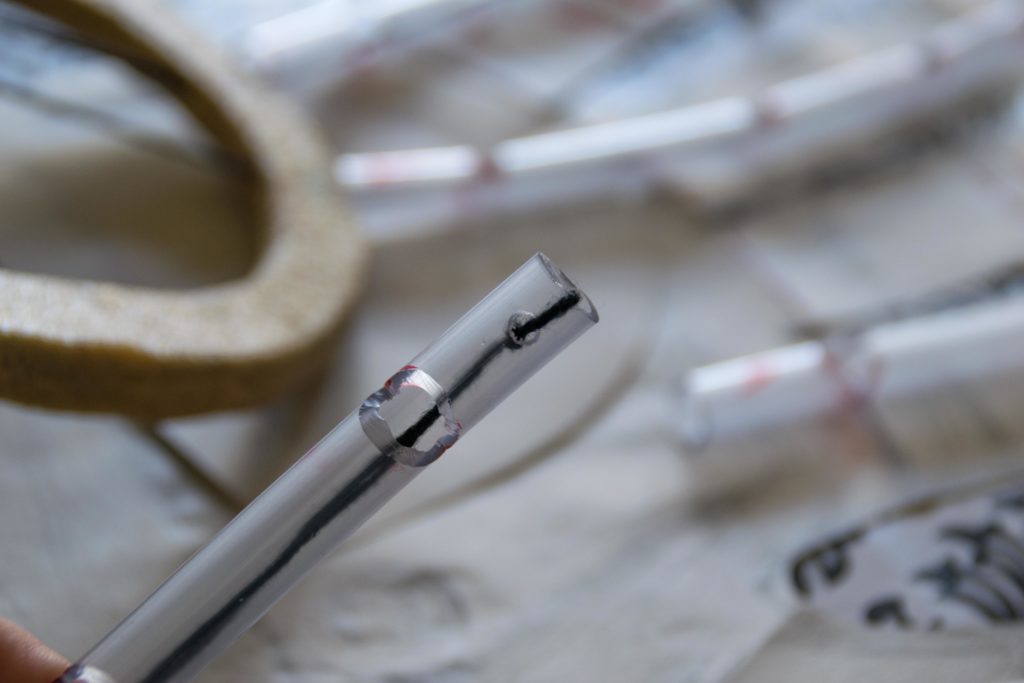
If you look closely, you will notice that I cut wedges in every single joint on one side. You need to do this in order to let the mechanism fold on itself. It won’t work otherwise. Also, I drilled holes to the tip of my fingers and attached the cord. I chose a thick cotton thread as I knew the knots would resist very well. Actually, I tried nylon but it was very slippery and the knots didn’t stay as well. I also drilled holes to my handle and fed the thread through them.
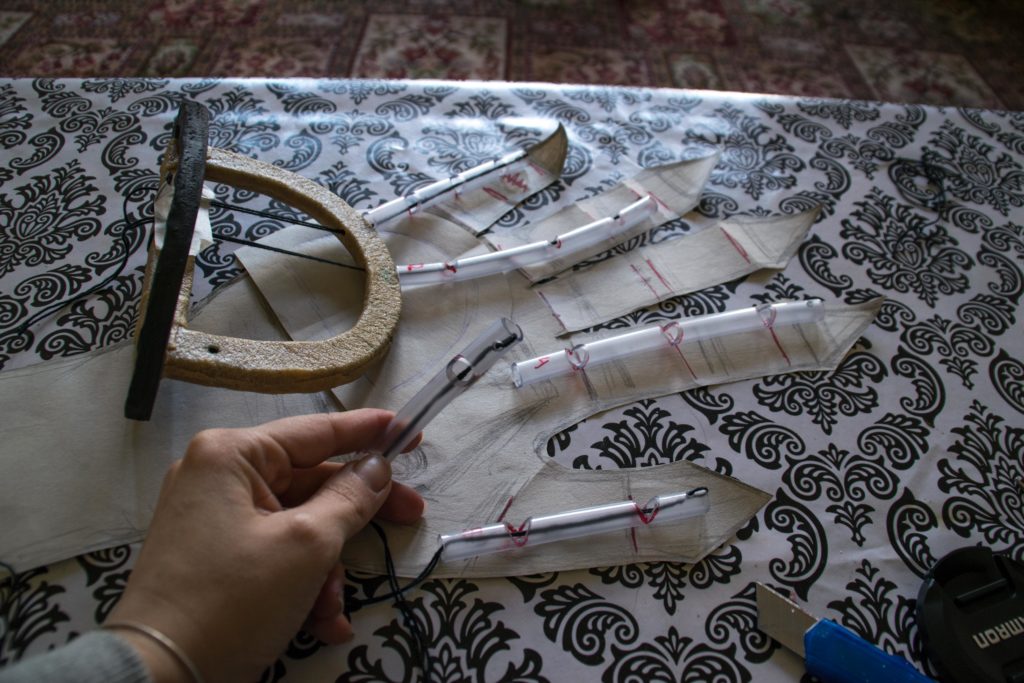
Now that I had all my fingers and the cords through them I used more worbla to keep the tubes attached to the core in place.
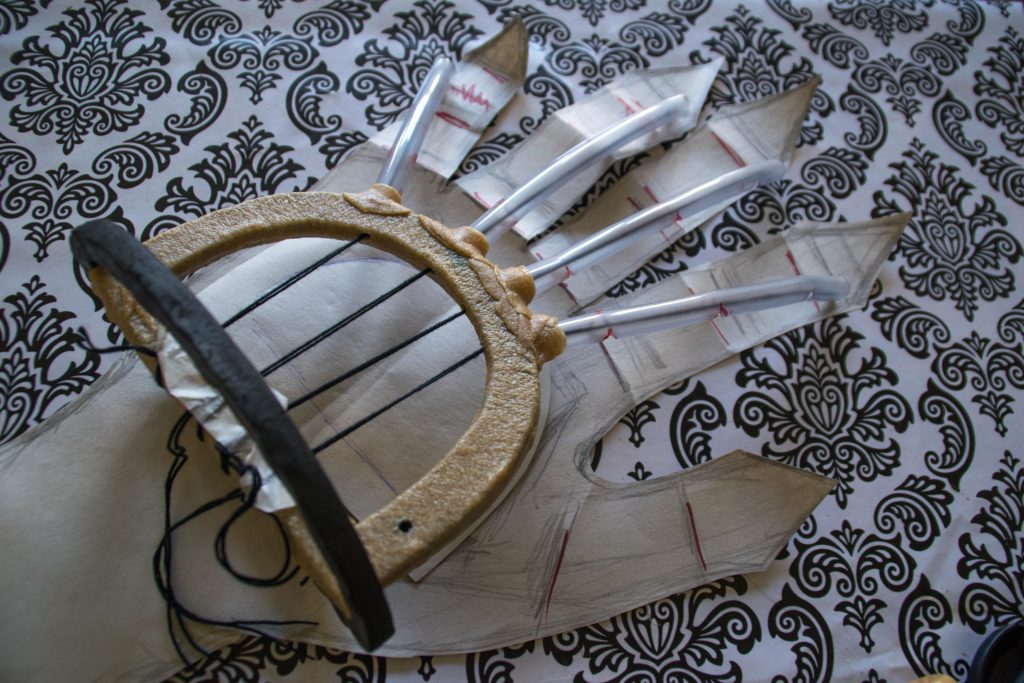
Notice how the thumb only has two joints and sits in an opposite direction to the other fingers. It was now the turn to attach the rings. I made sure my thread was tense but not pulling. Then, I added a ring to the bottom of each finger. I can actually fold each finger individually but as I was planning to use this prop in a competition I also attached a piece of plastic that holds all the rings at the same time. If I pull this piece I can close all the fingers at the same time.


The cover
I needed the hand to be much thicker. In order to achieve this, I added layers of foa and filling to my hand to start shaping it.


The inside of the hand was still hollow but I used pieces of foam to fill all the gaps around them. A heatgun is very useful to shape all the foam. I cut or sanded any excess. It was a process of trial and error. Narrow strips of foam made my tendons.


When I was happy with the overall shape of the hand I used 2mm foam to cover it all. I used the heatgun to shape it and a sharp pencil to create the creases on the hand.


Finally, I covered each individual phalanx with another piece of foam. I made sure the joints weren’t visible but they still needed to move freely. The rest of the arm is actually more foam in the form of a tube and some more details with foam.
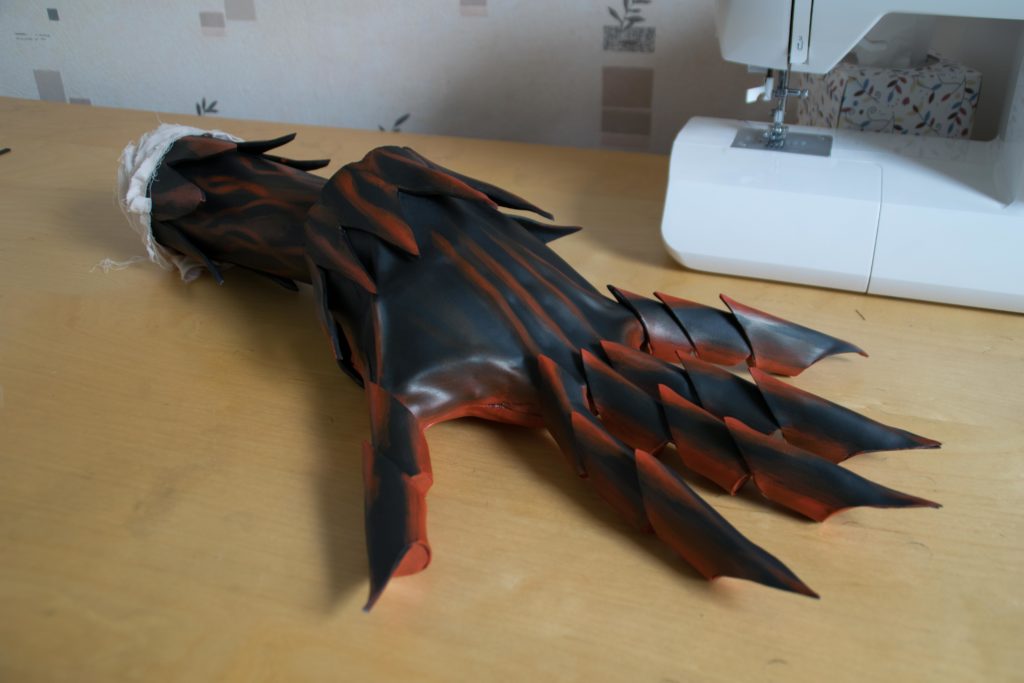
Final result


Once I was happy with my hand I primed it and added some colour with acrylic paint. I used a gradient from black to red and protected it all with satin varnish. This is how my hand looked with my cosplay when I finished it.

The whole process took me about two weeks of very intense labour day and night. And this was after weeks of research. However, it was all worth it and I would do it all over again. Check the end of the video to see my hand in movement!