One of the first challenges you face when you create a new garment is inserting a zipper… I know, I used to hate it too. But one day you realise it is not so difficult anymore and practice makes perfect. There are many different types of zippers, and also several ways to insert them. This is the method I use to sew a centered zipper, and it is probably one of the easiest ones.
What is a centered zipper and when to sew it
You may be wondering, what is a centered zipper and when to use it. A centered zipper is a technique to sew a normal zipper at the center of your fabric. It features an evenly placed stitching line on either side of the opening seamline. You can usually find it at the center front, center back or sleeve and leg openings of a garment.
An advantage of sewing a zipper like this, is that you will have your fabric perfectly lined every time before you insert it. You won’t have to figure out how high or low each side of the zipper needs to be, which is one of the usual problems when inserting a zipper.
5 Easy steps to sew a centered zipper
This is my preferred method to sew a centered zipper. It is quite easy and if you are careful enough following each step you will get great results very easily.
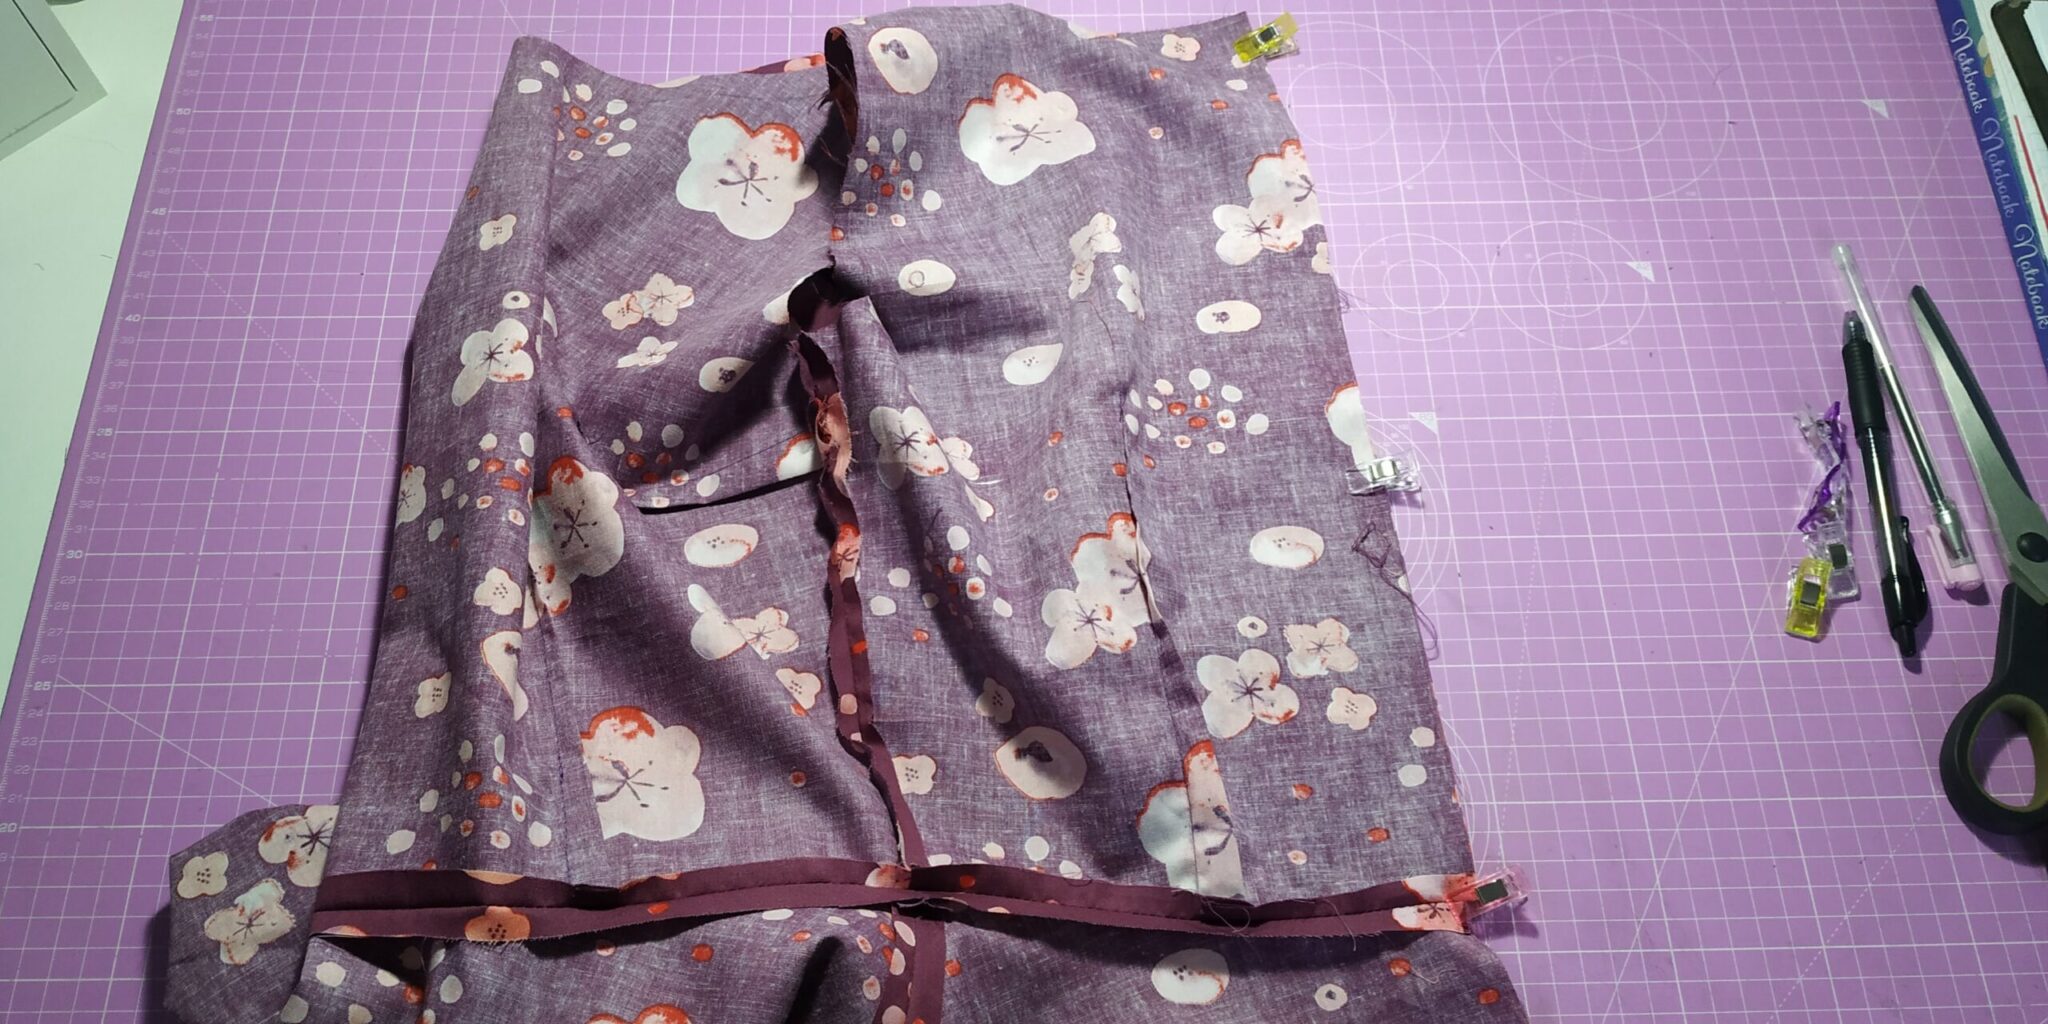
Step 1. Close your seam completely
It may look strange, but the trick to get a perfect centered zipper is to completely close your seam before you insert it. Pin your seam and use a long stitch on your sewing machine to close the gap.
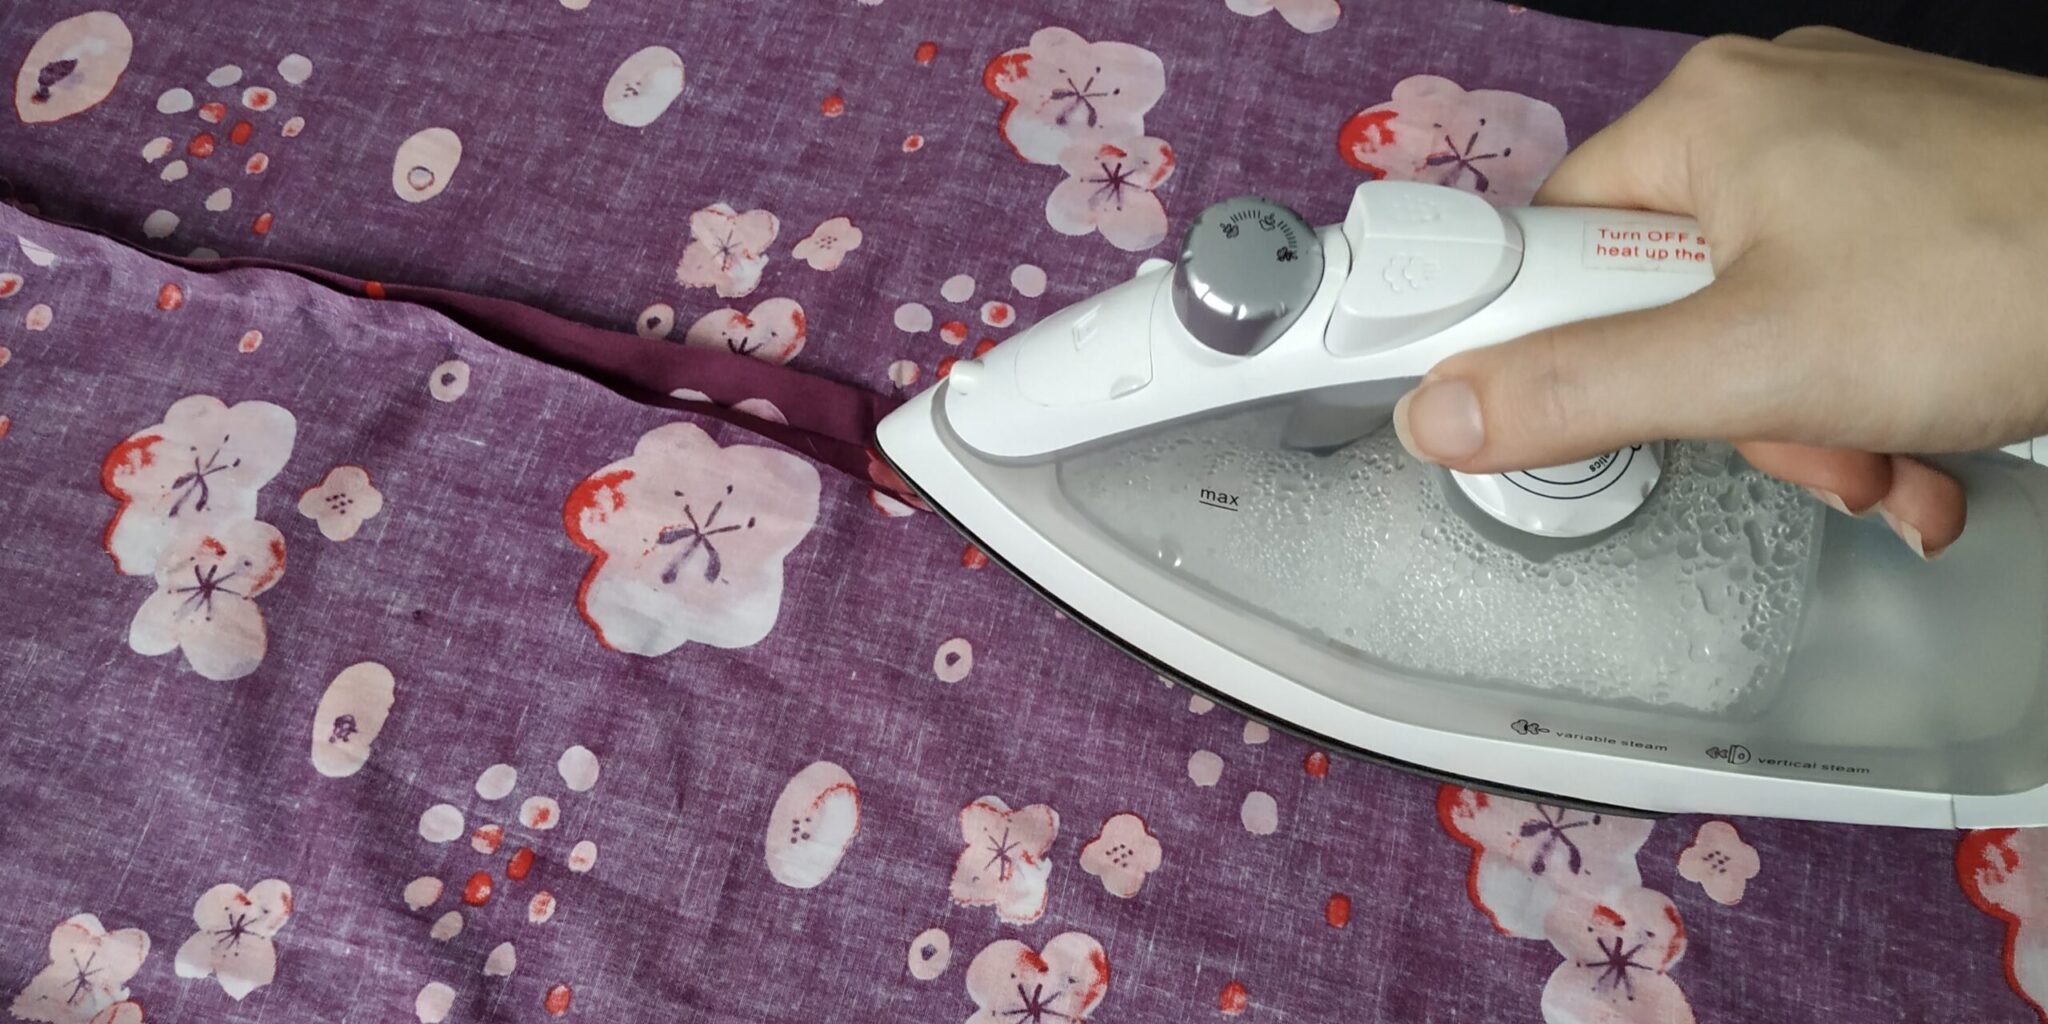
Step 2. Press the seams open
In order to get a crisp finish and perfect centered zipper you want to press your seams open before you go to the next step. Hold your iron on top of your fabric for a few seconds until it lays completely flat.
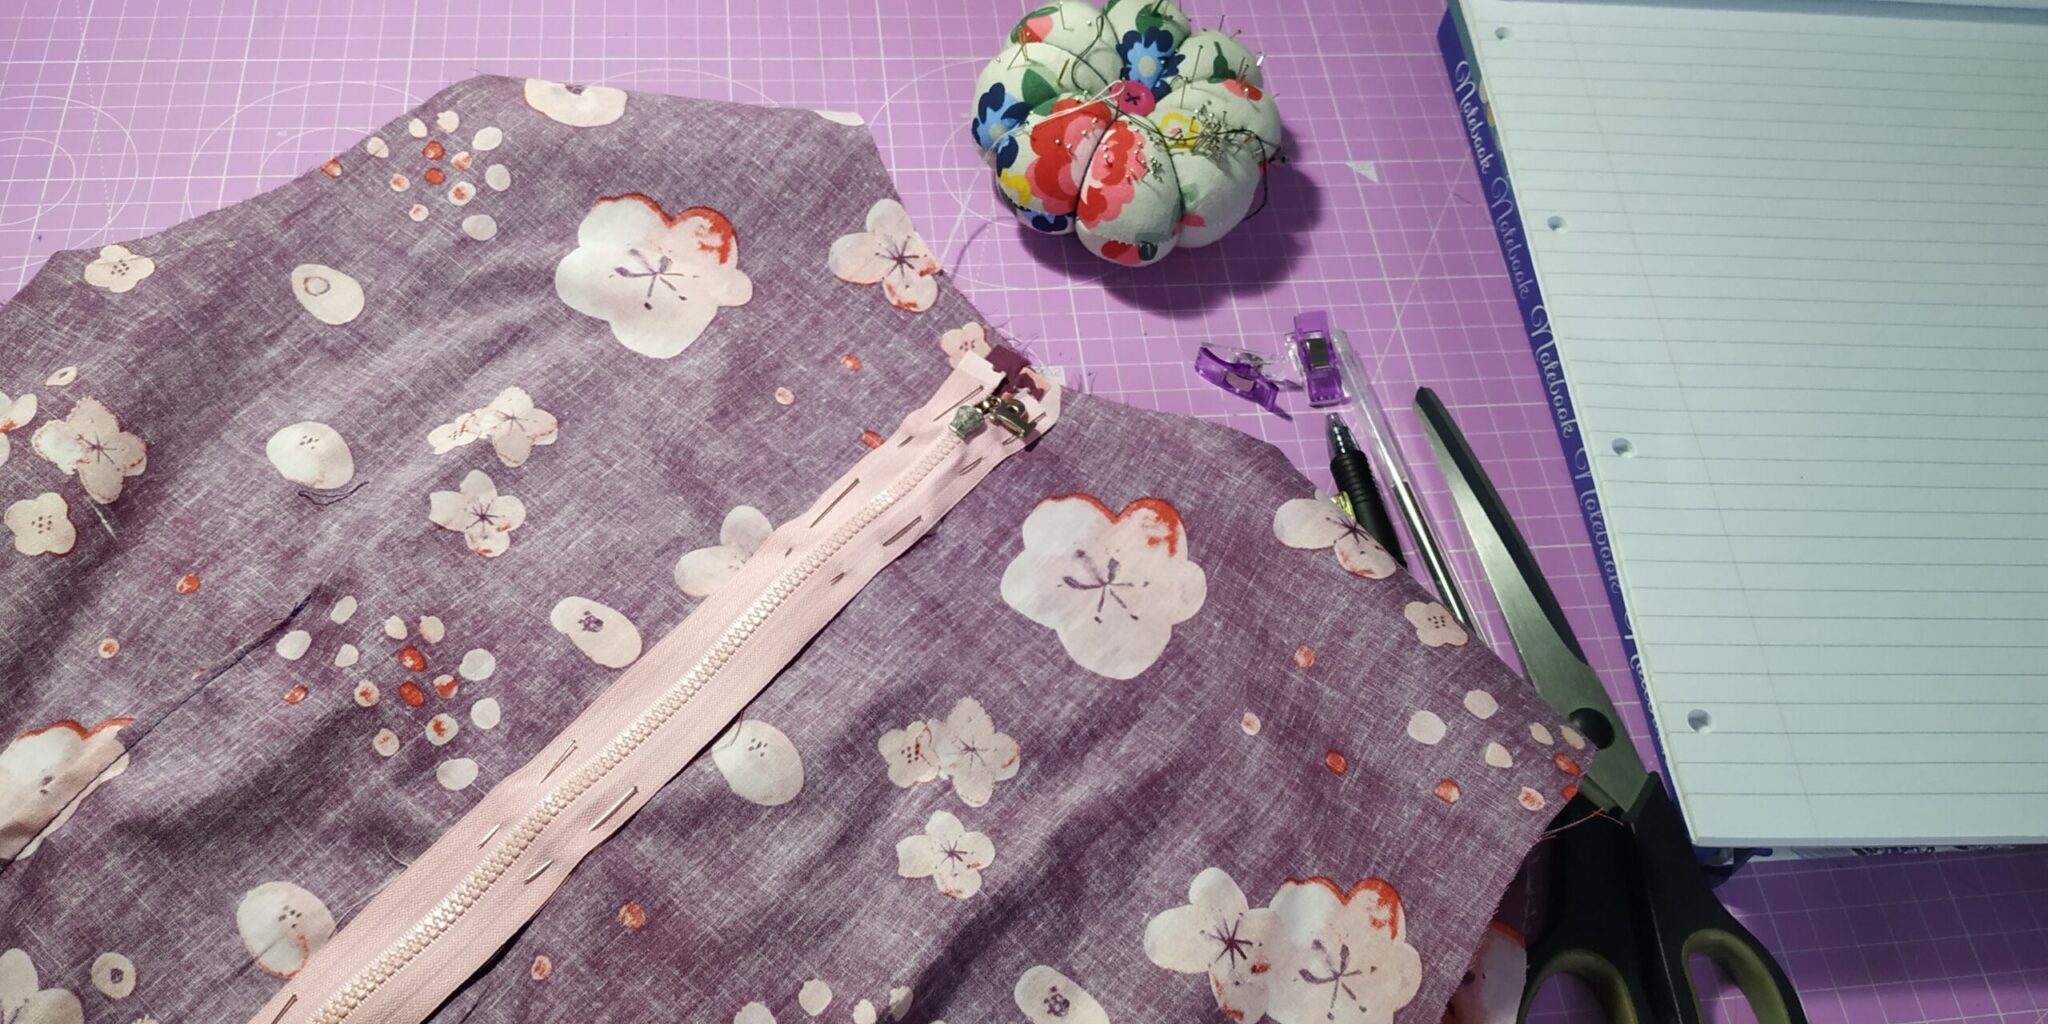
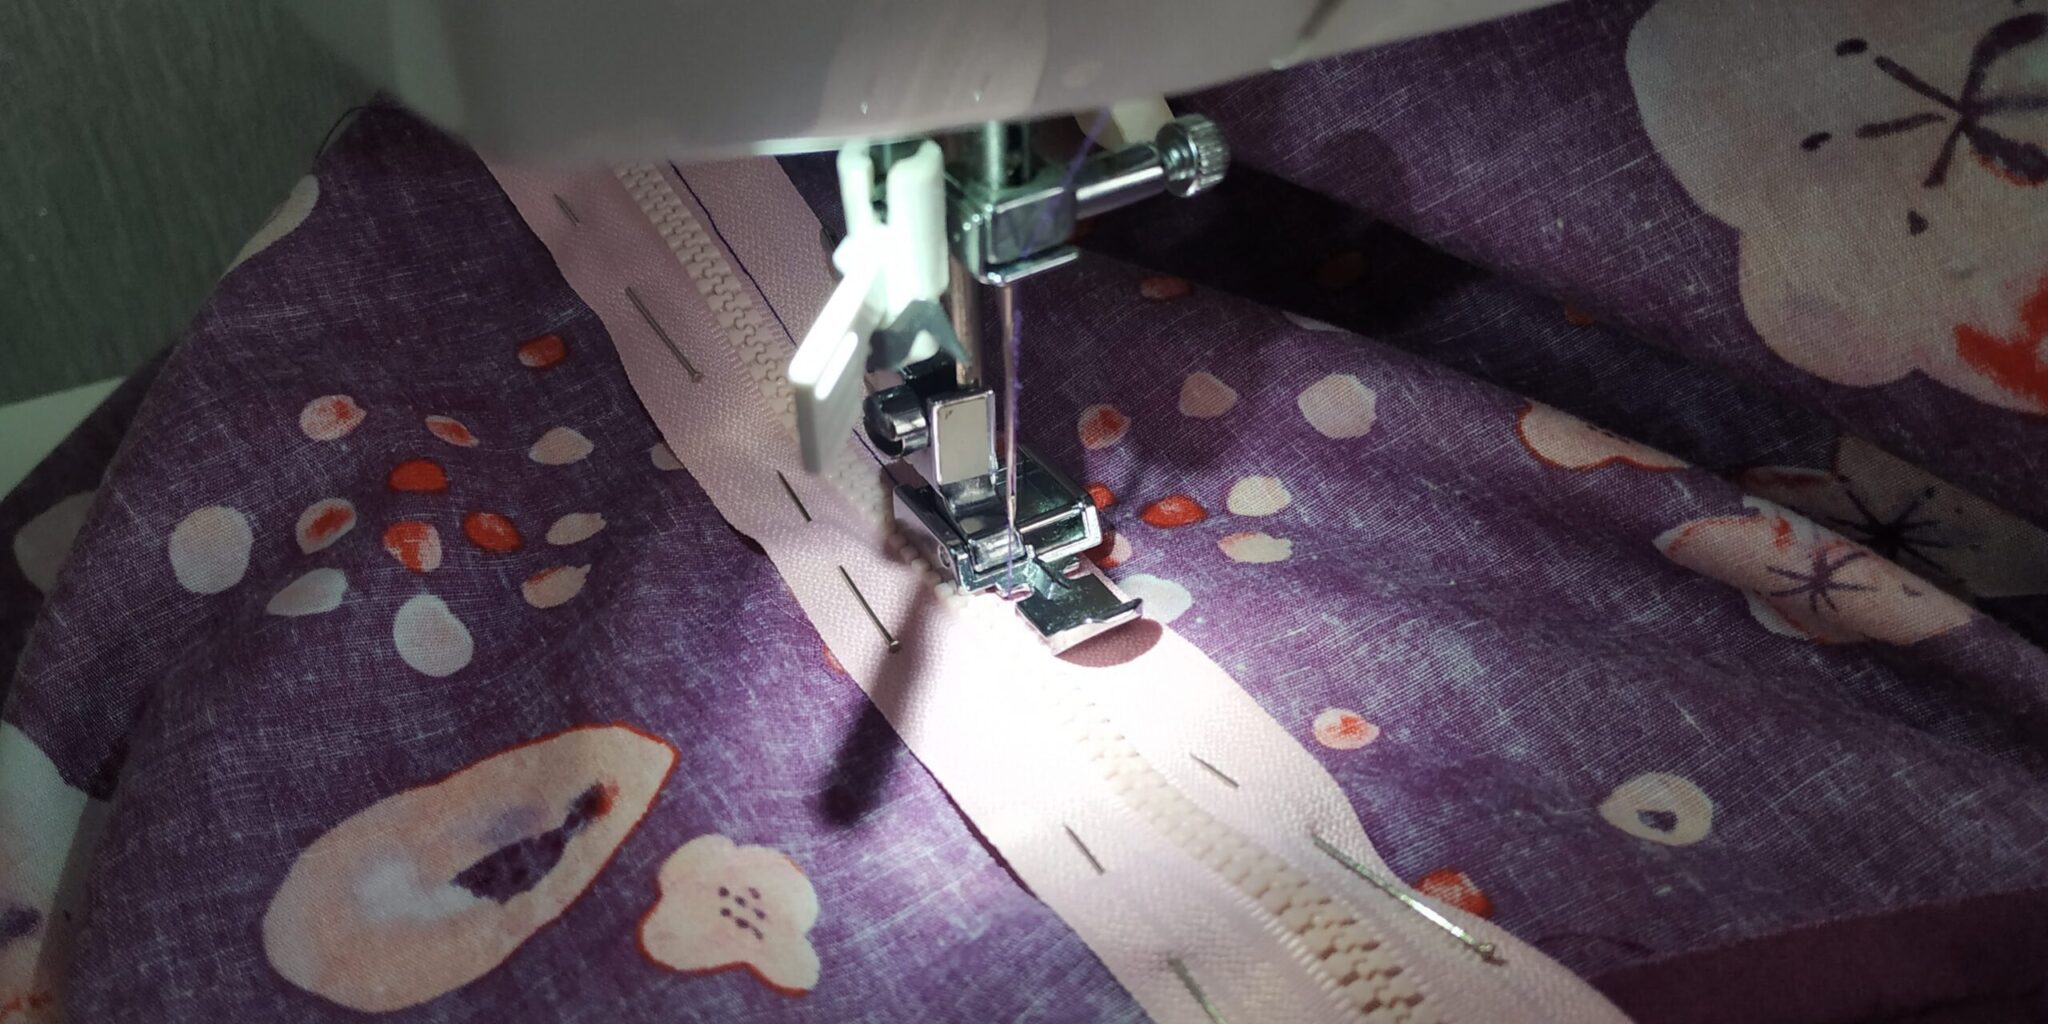
Step 3. Pin your zipper in place
For this step, you want to pin your zipper exactly to the center of your seam. It is a good idea to baste it as well. This will be much easier if your seams are approximately the same width as the zipper. Your zipper should be facing INWARDS towards the seam and you want to place it on the inside of the garment.
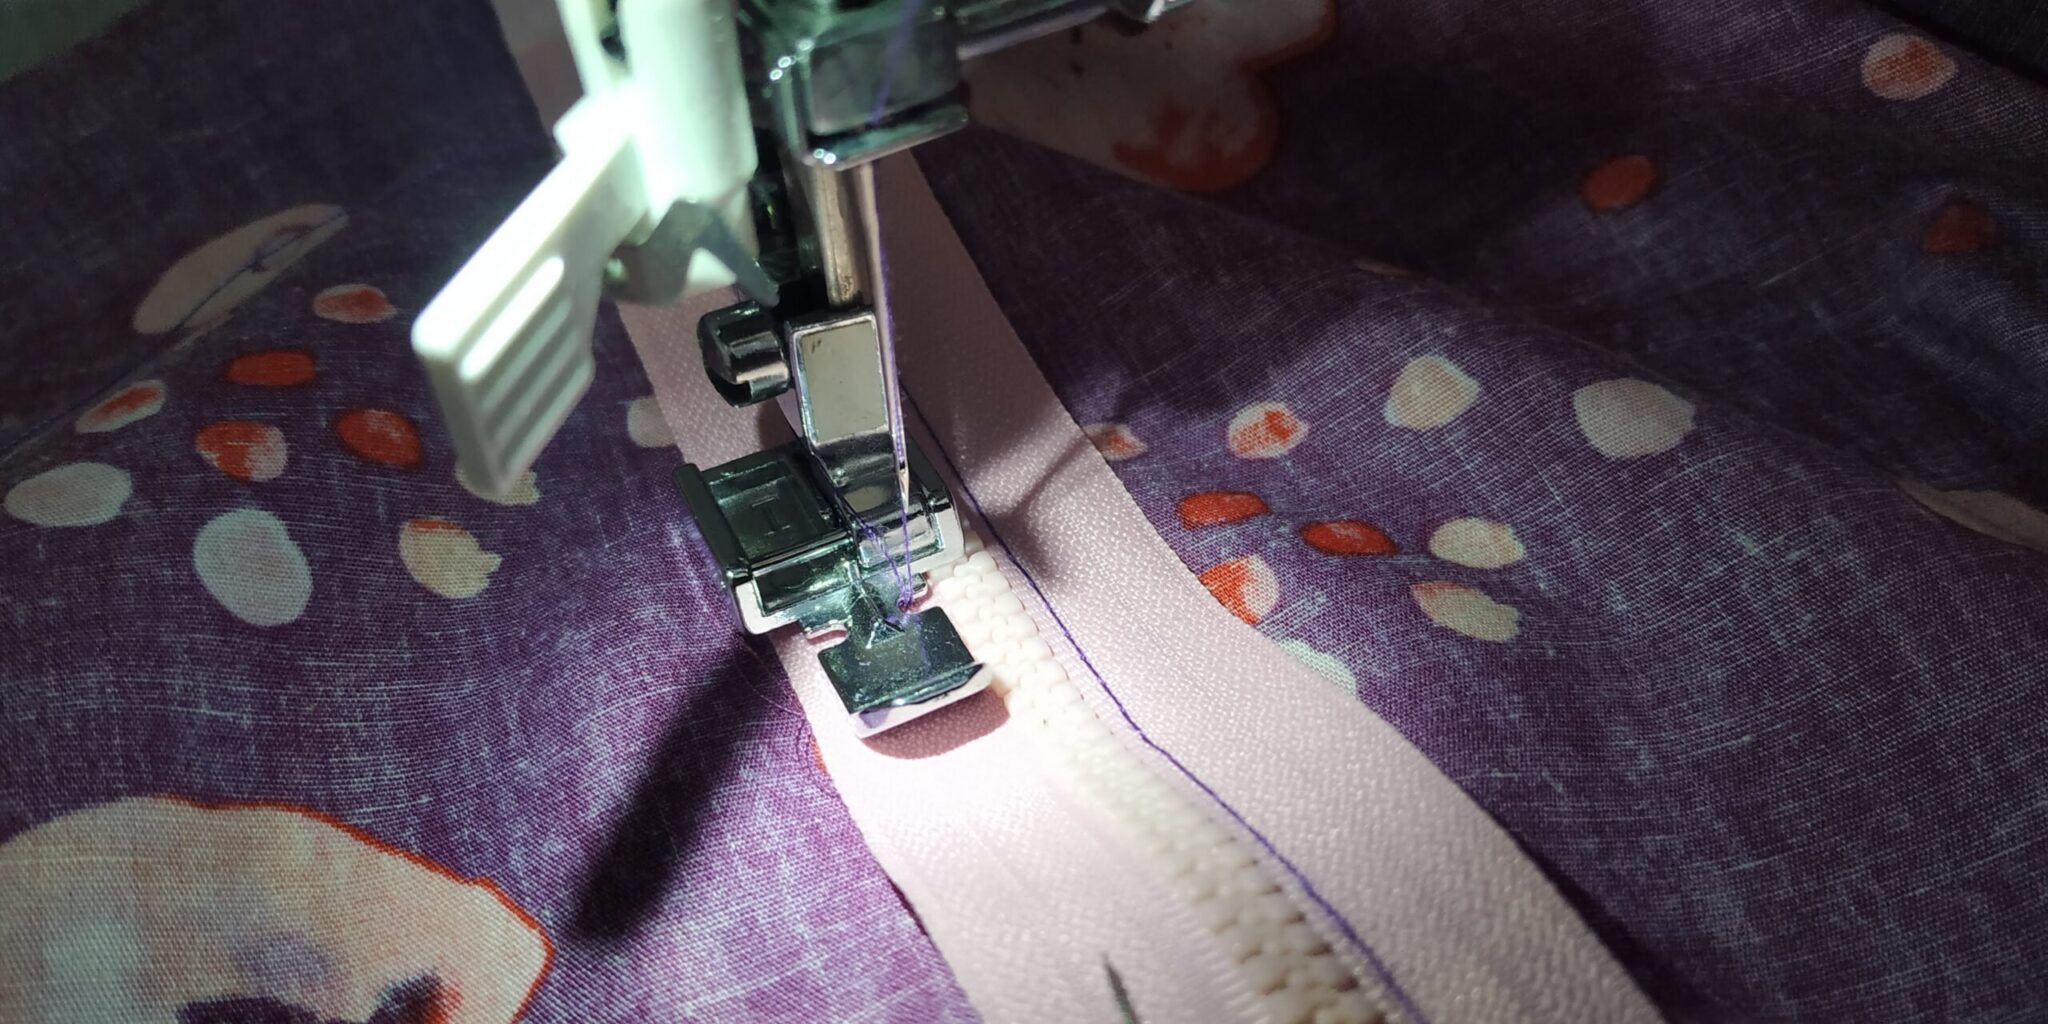
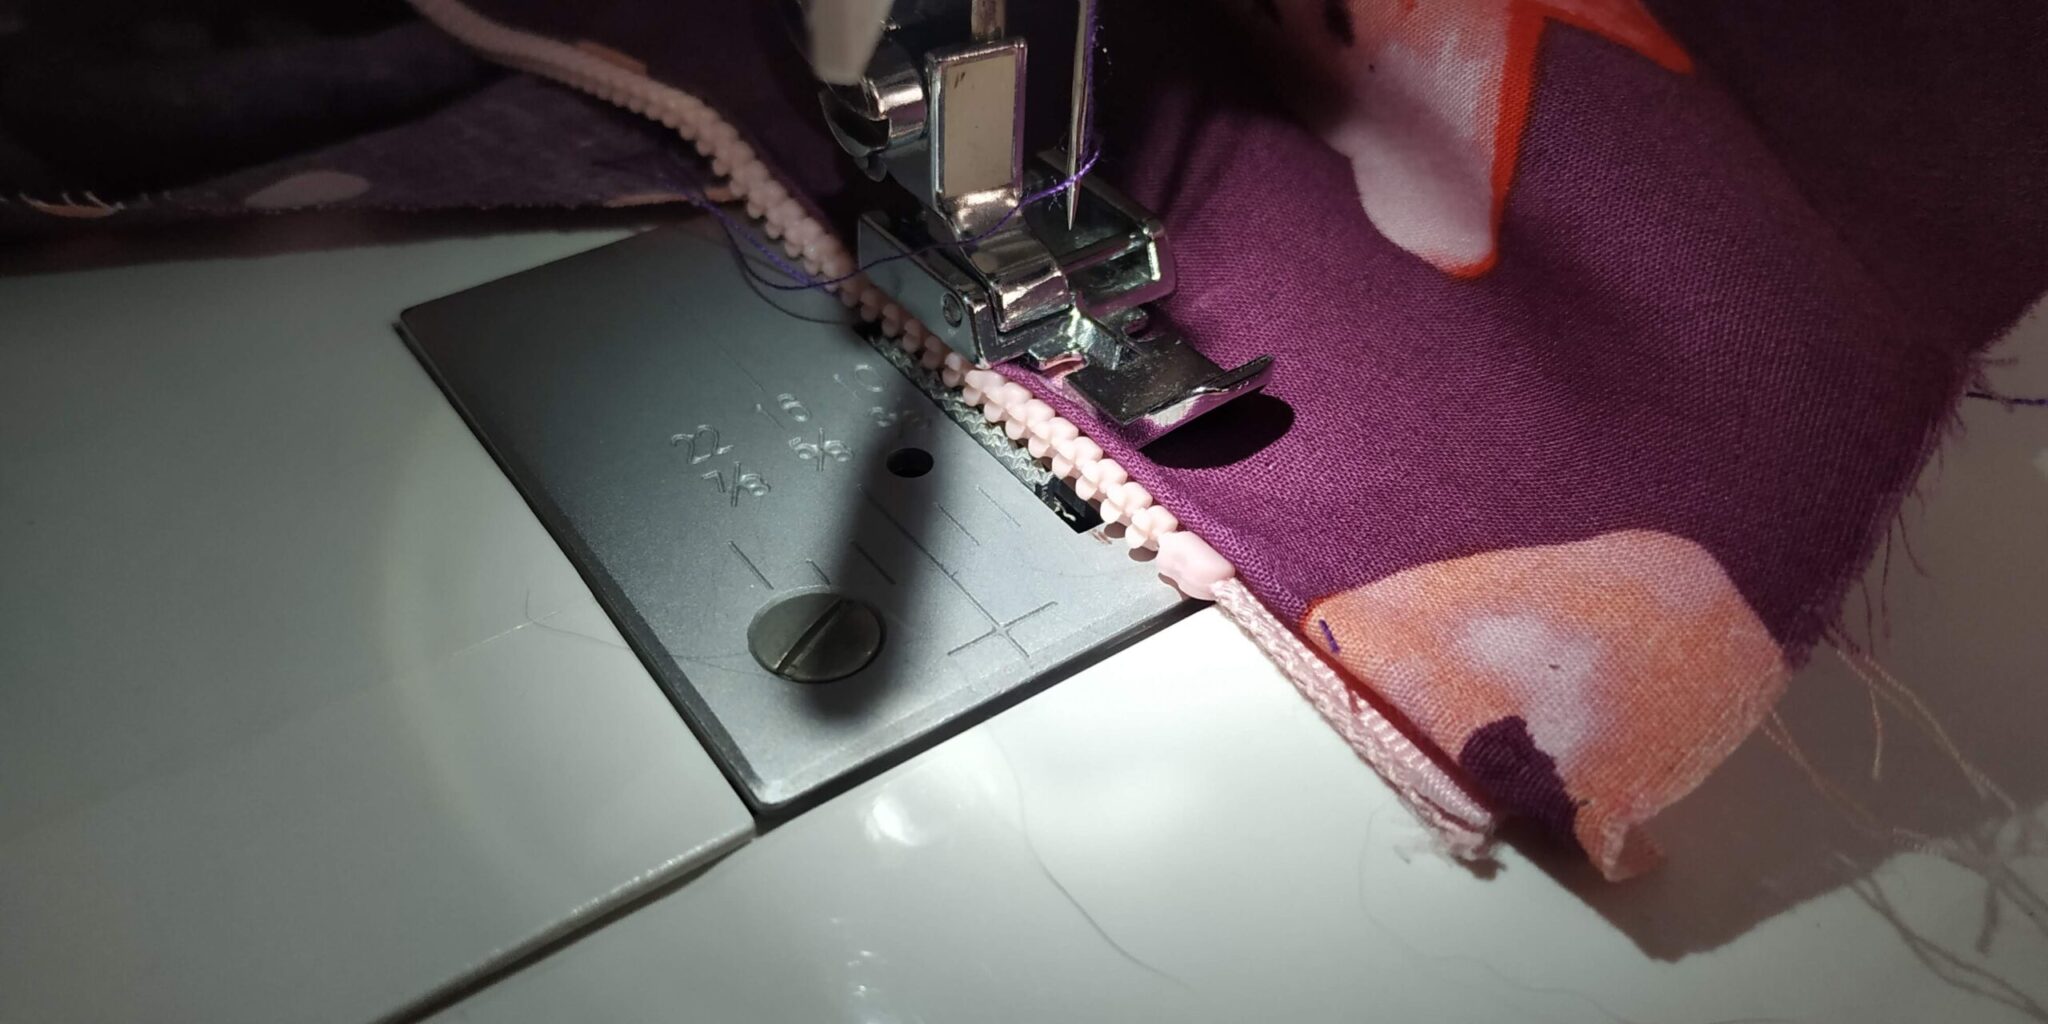
Step 4. Sew the zipper
Using a zipper foot, and starting a few centimeters from the top, sew each side of the ziper, you can even sew across the ziper and turn your fabric as long as you avoid the teeth of the zipper. Otherwise, finish the bottom part by hand.
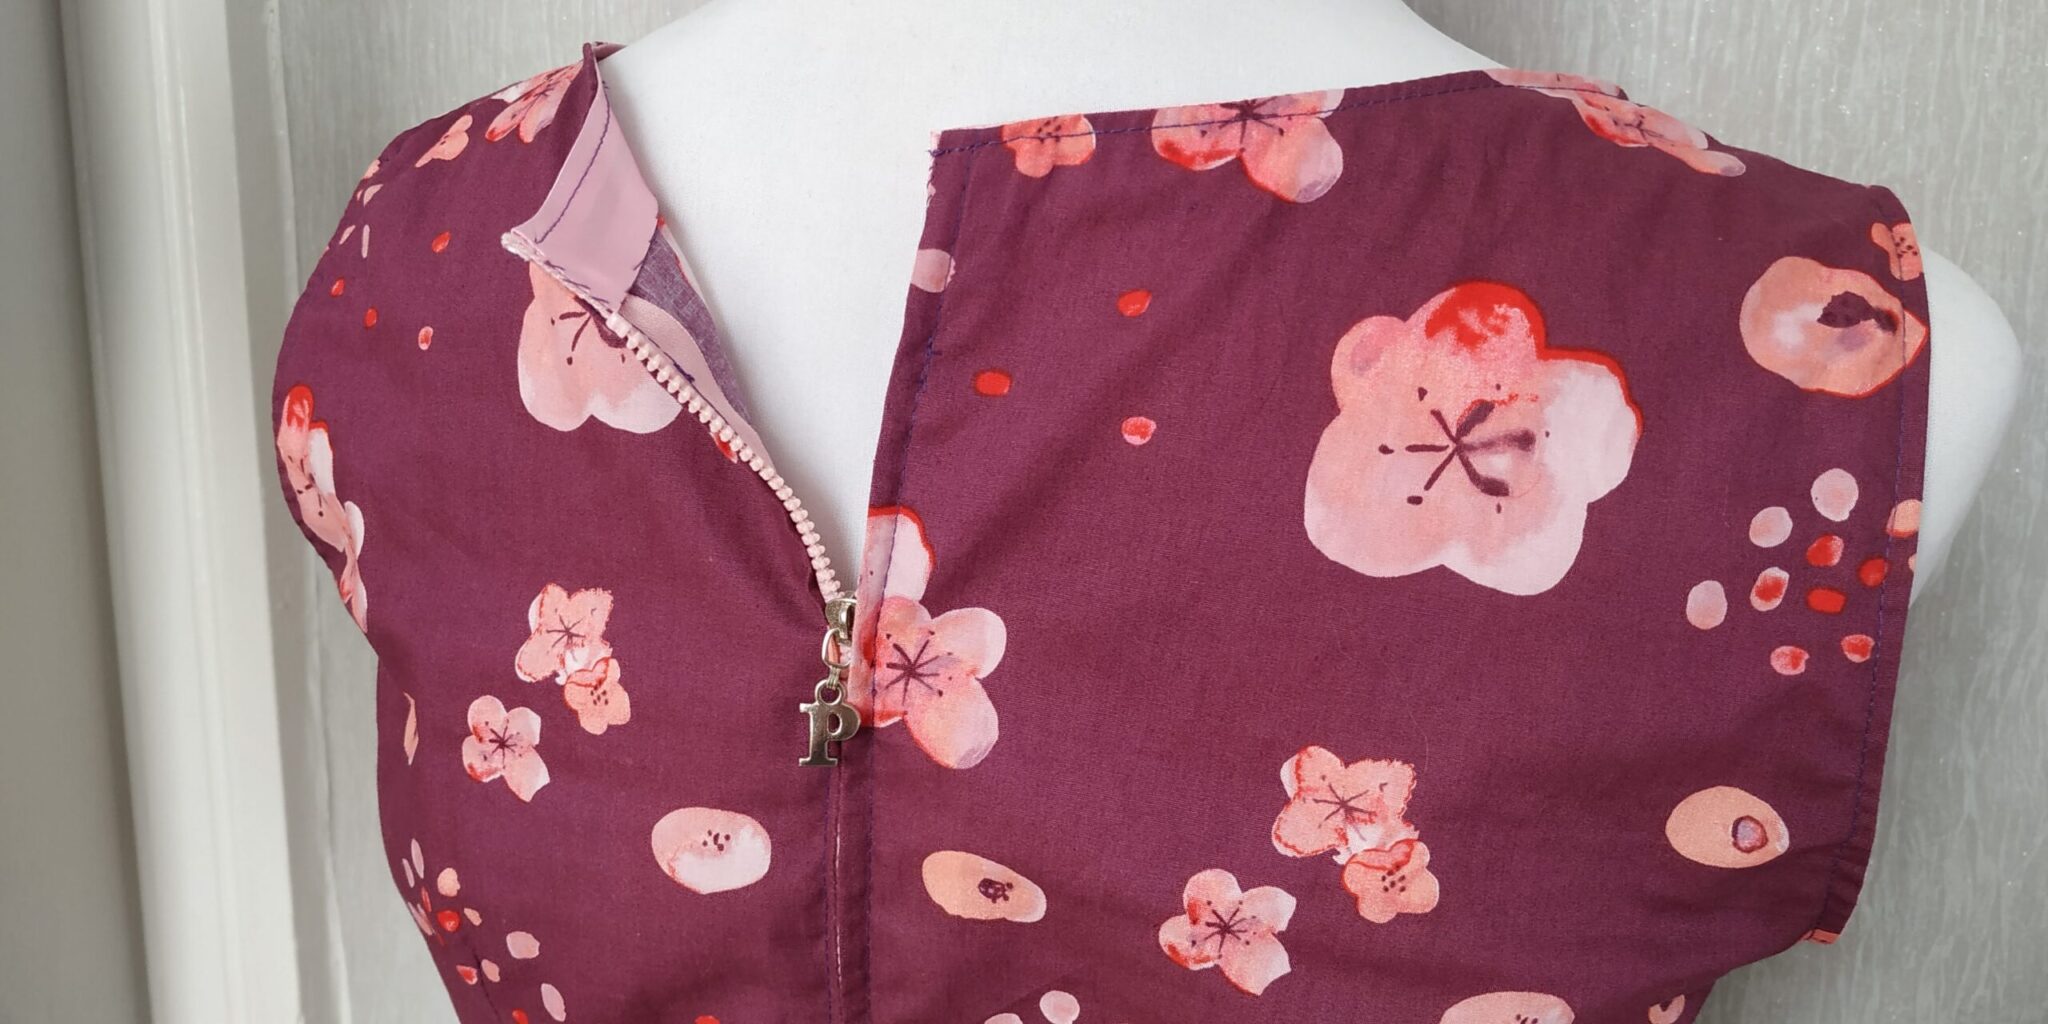
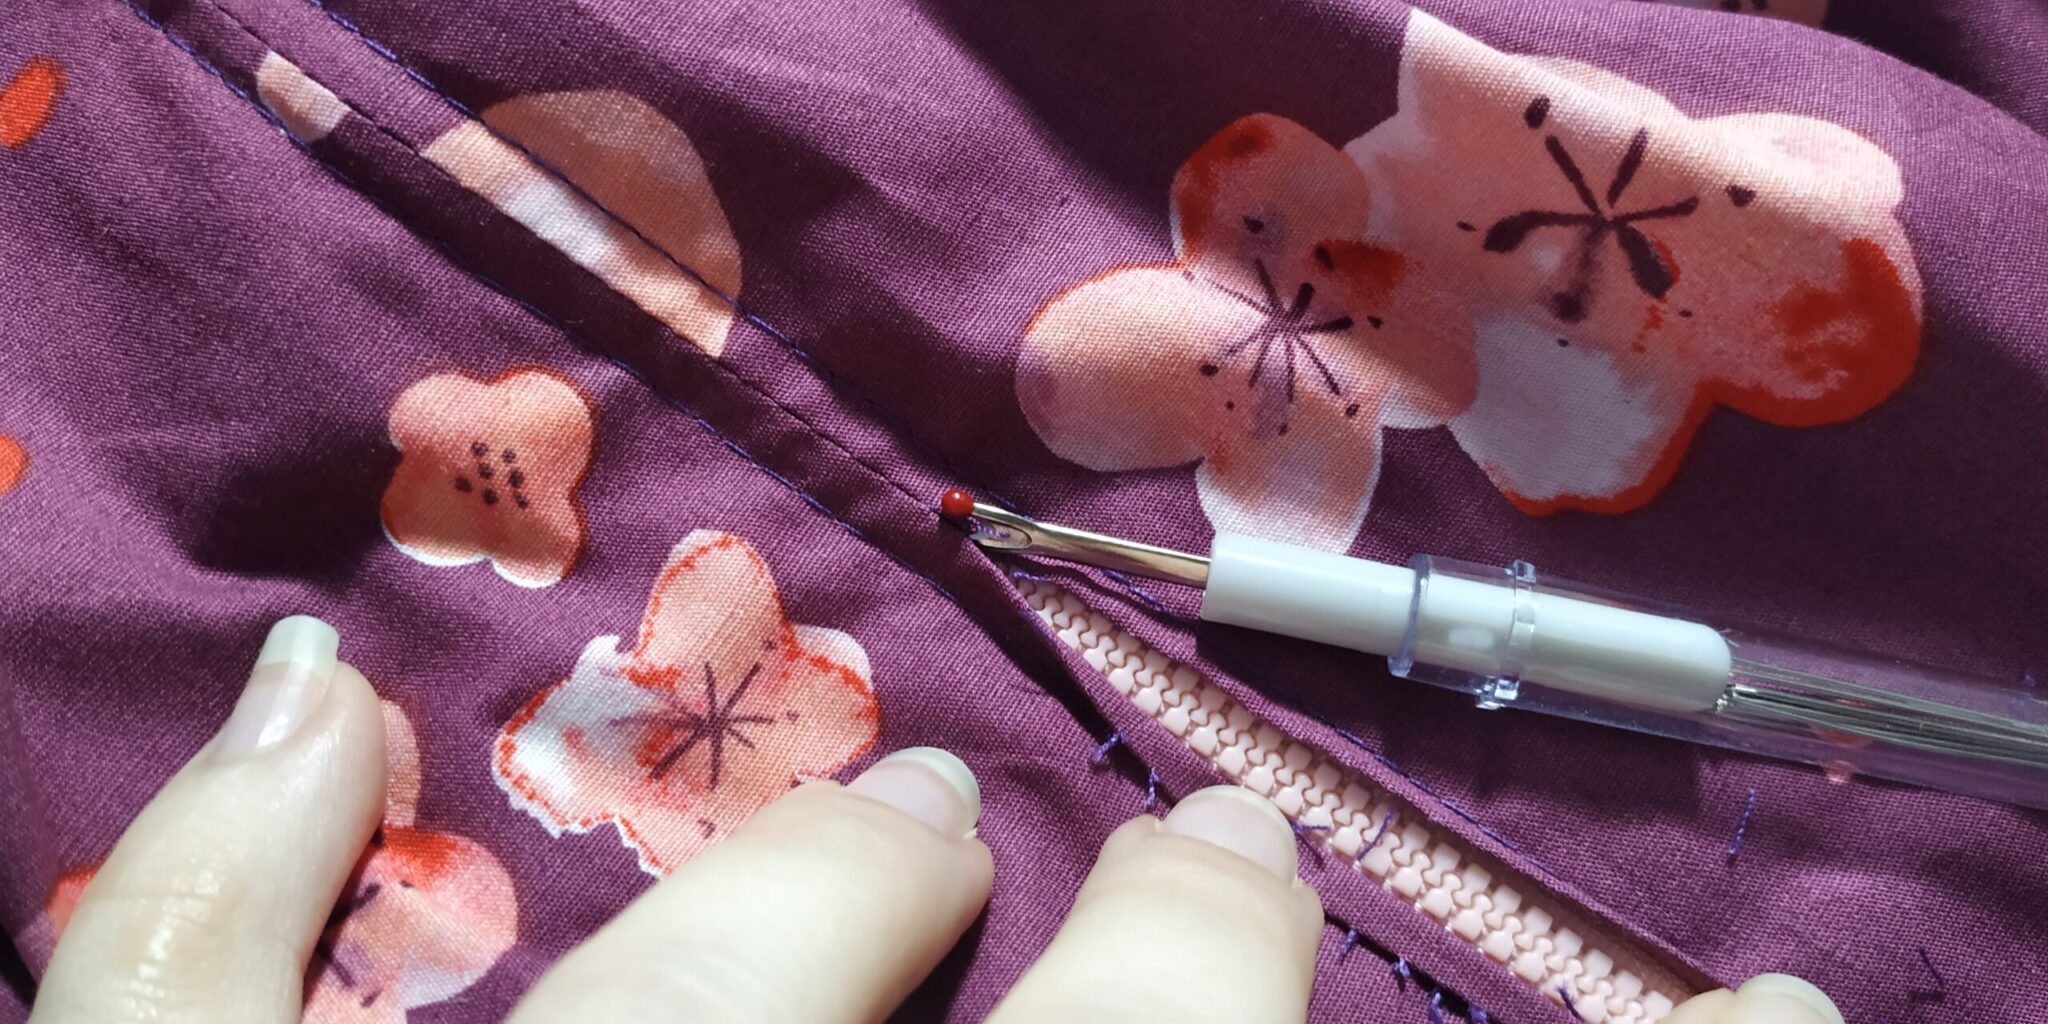
Step 5. Rip open the seam
Very carefully, use a seam ripper or sharp scissors to open the seam at the front and reveal your zipper. You can remove the threads with tweezers.
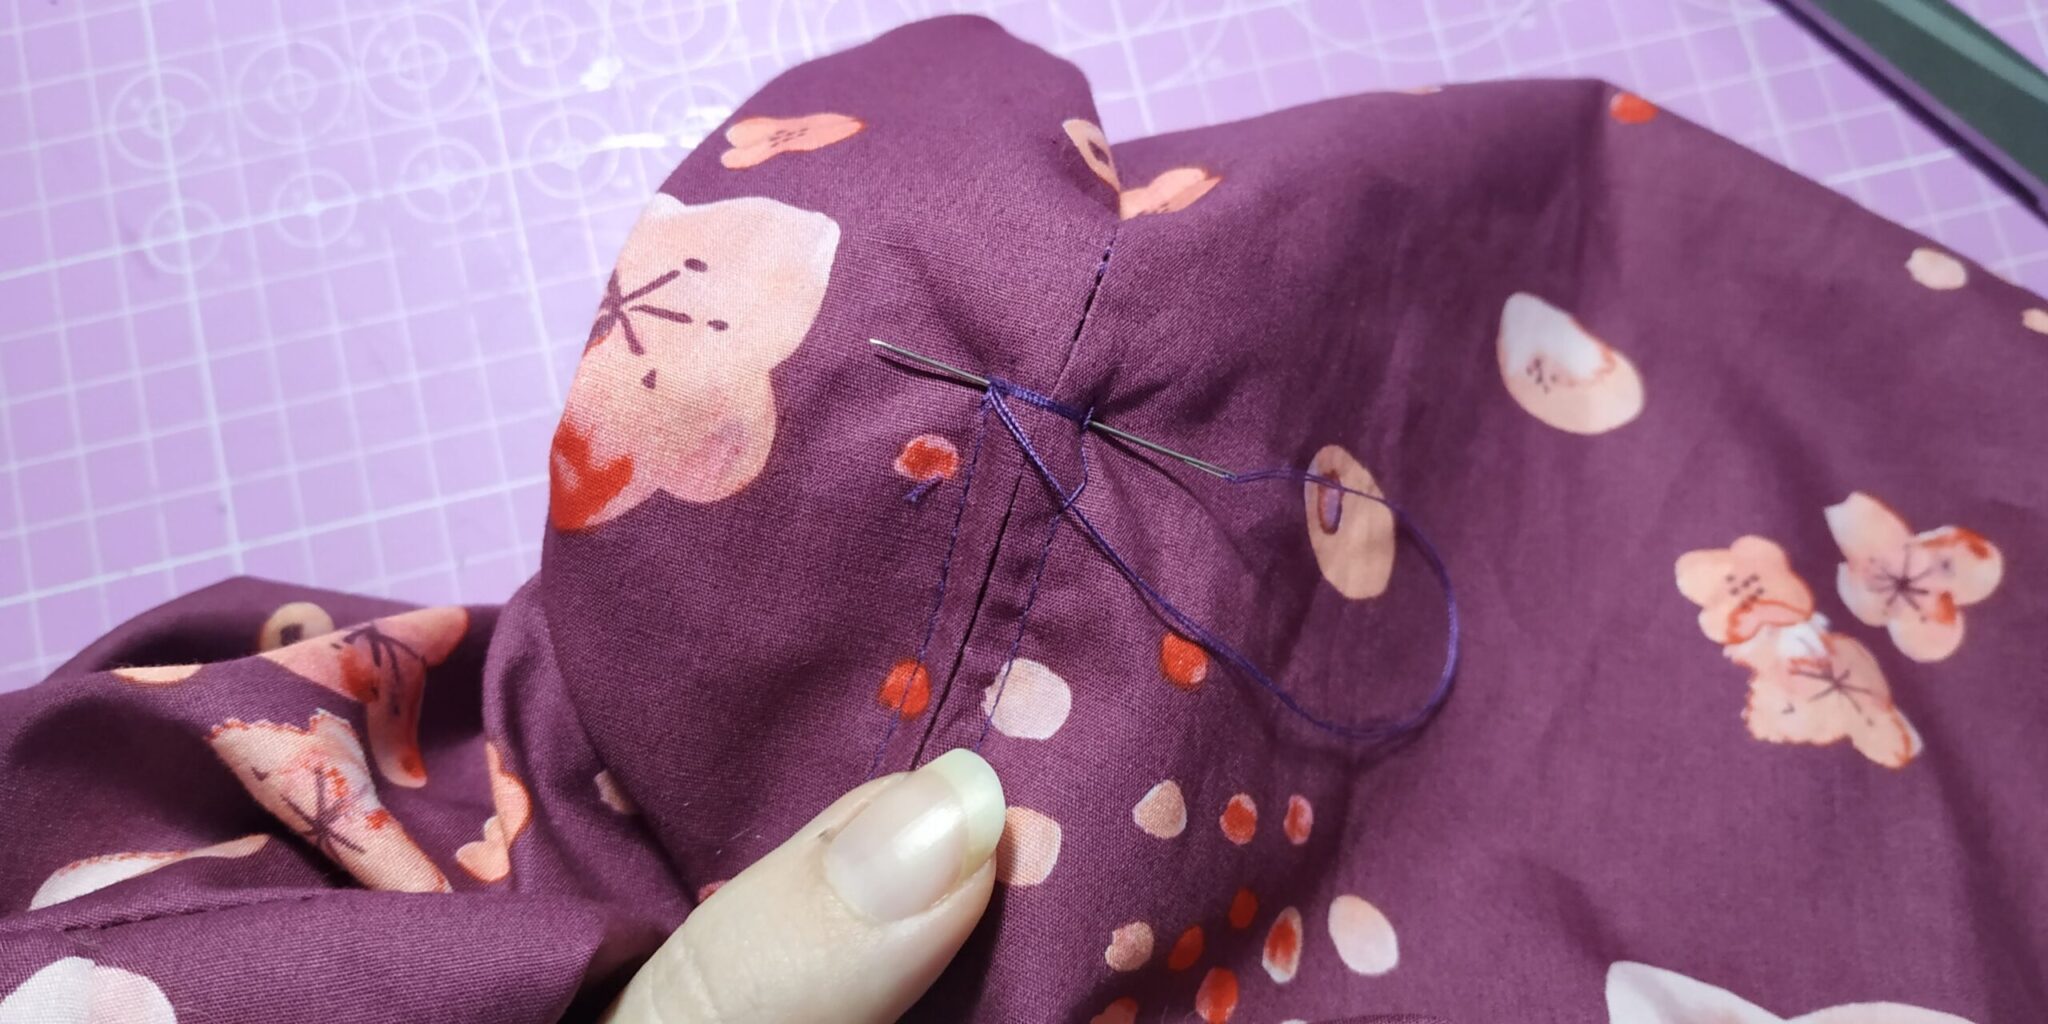
Also, make sure to finish the top of the zipper where your zipper foot couldn’t reach. You will need to open the zipper to to this.
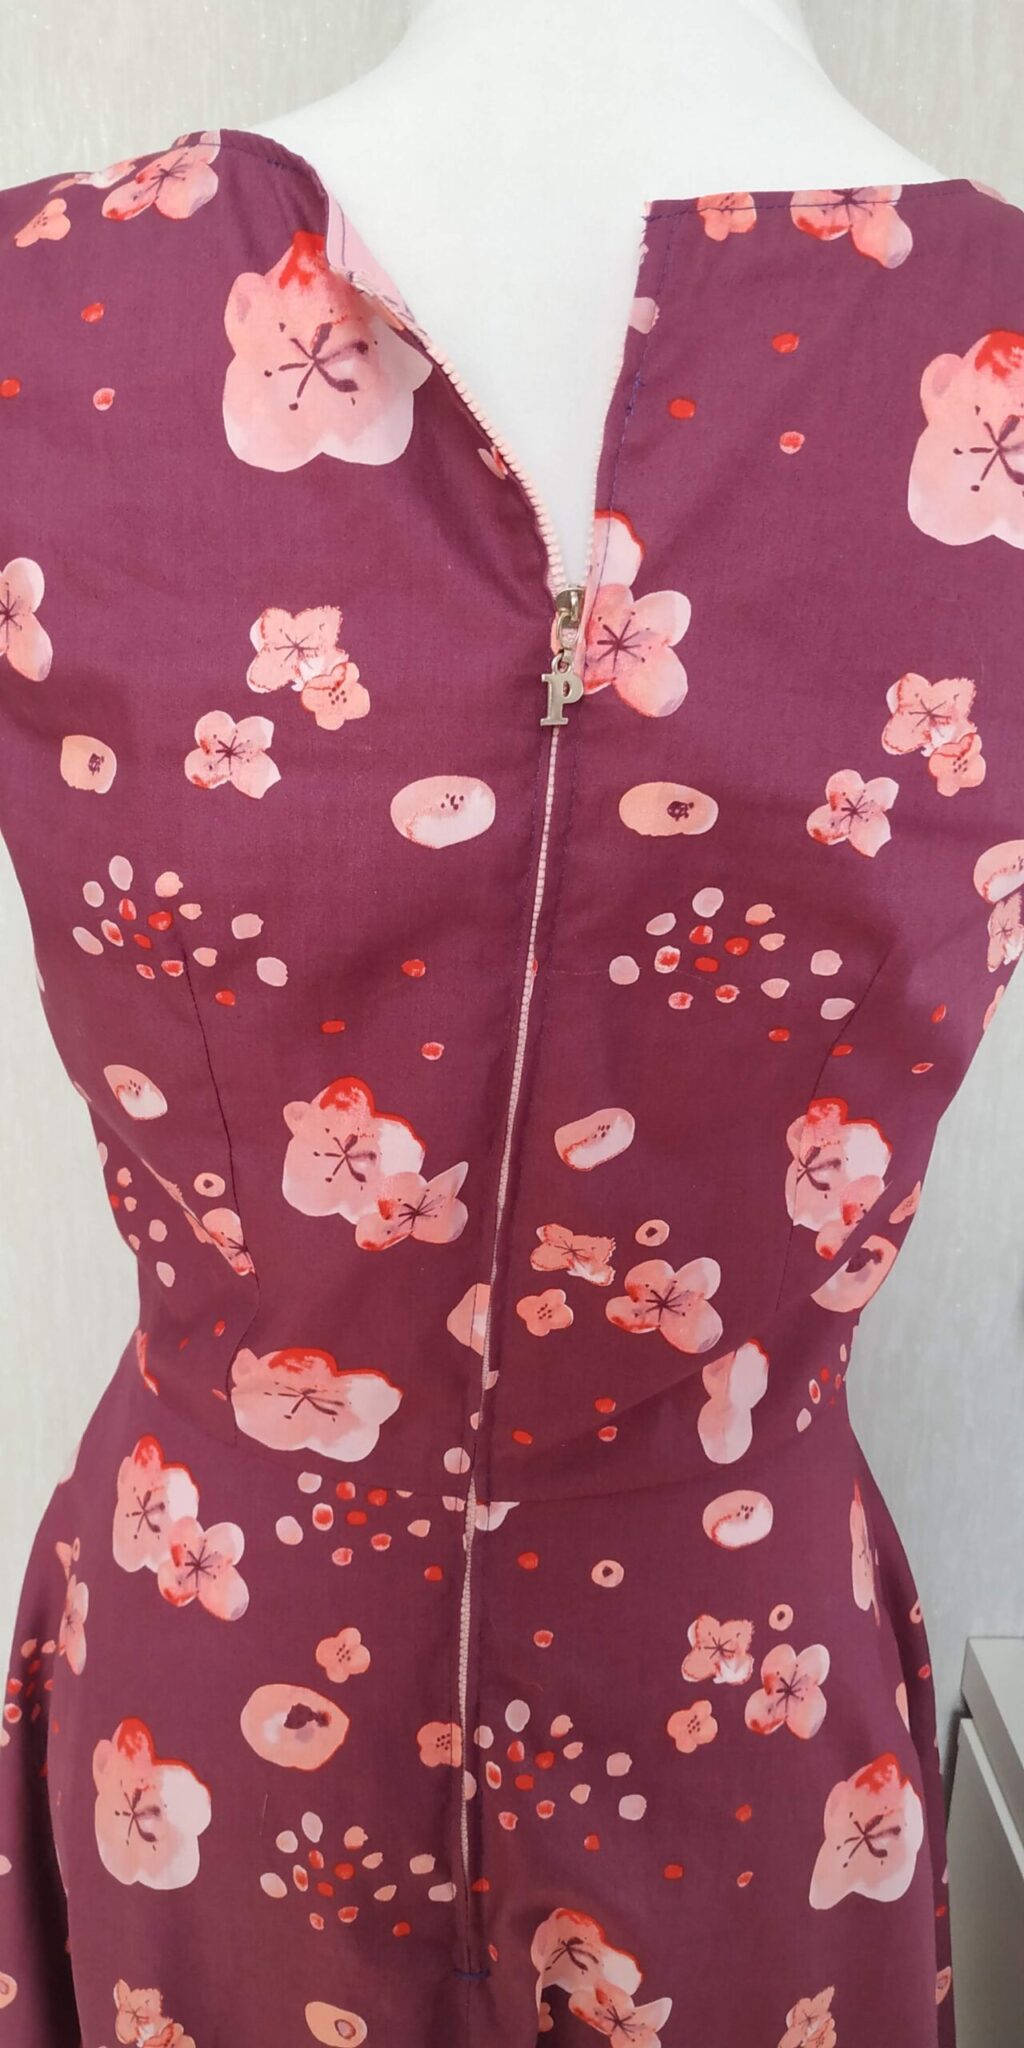
Finished!
And it is done. You can pat yourself on the back for a perfect fitted zipper. You can now finish your edges normally. Don’t forget to press all your seams again, being careful not to melt your zipper.
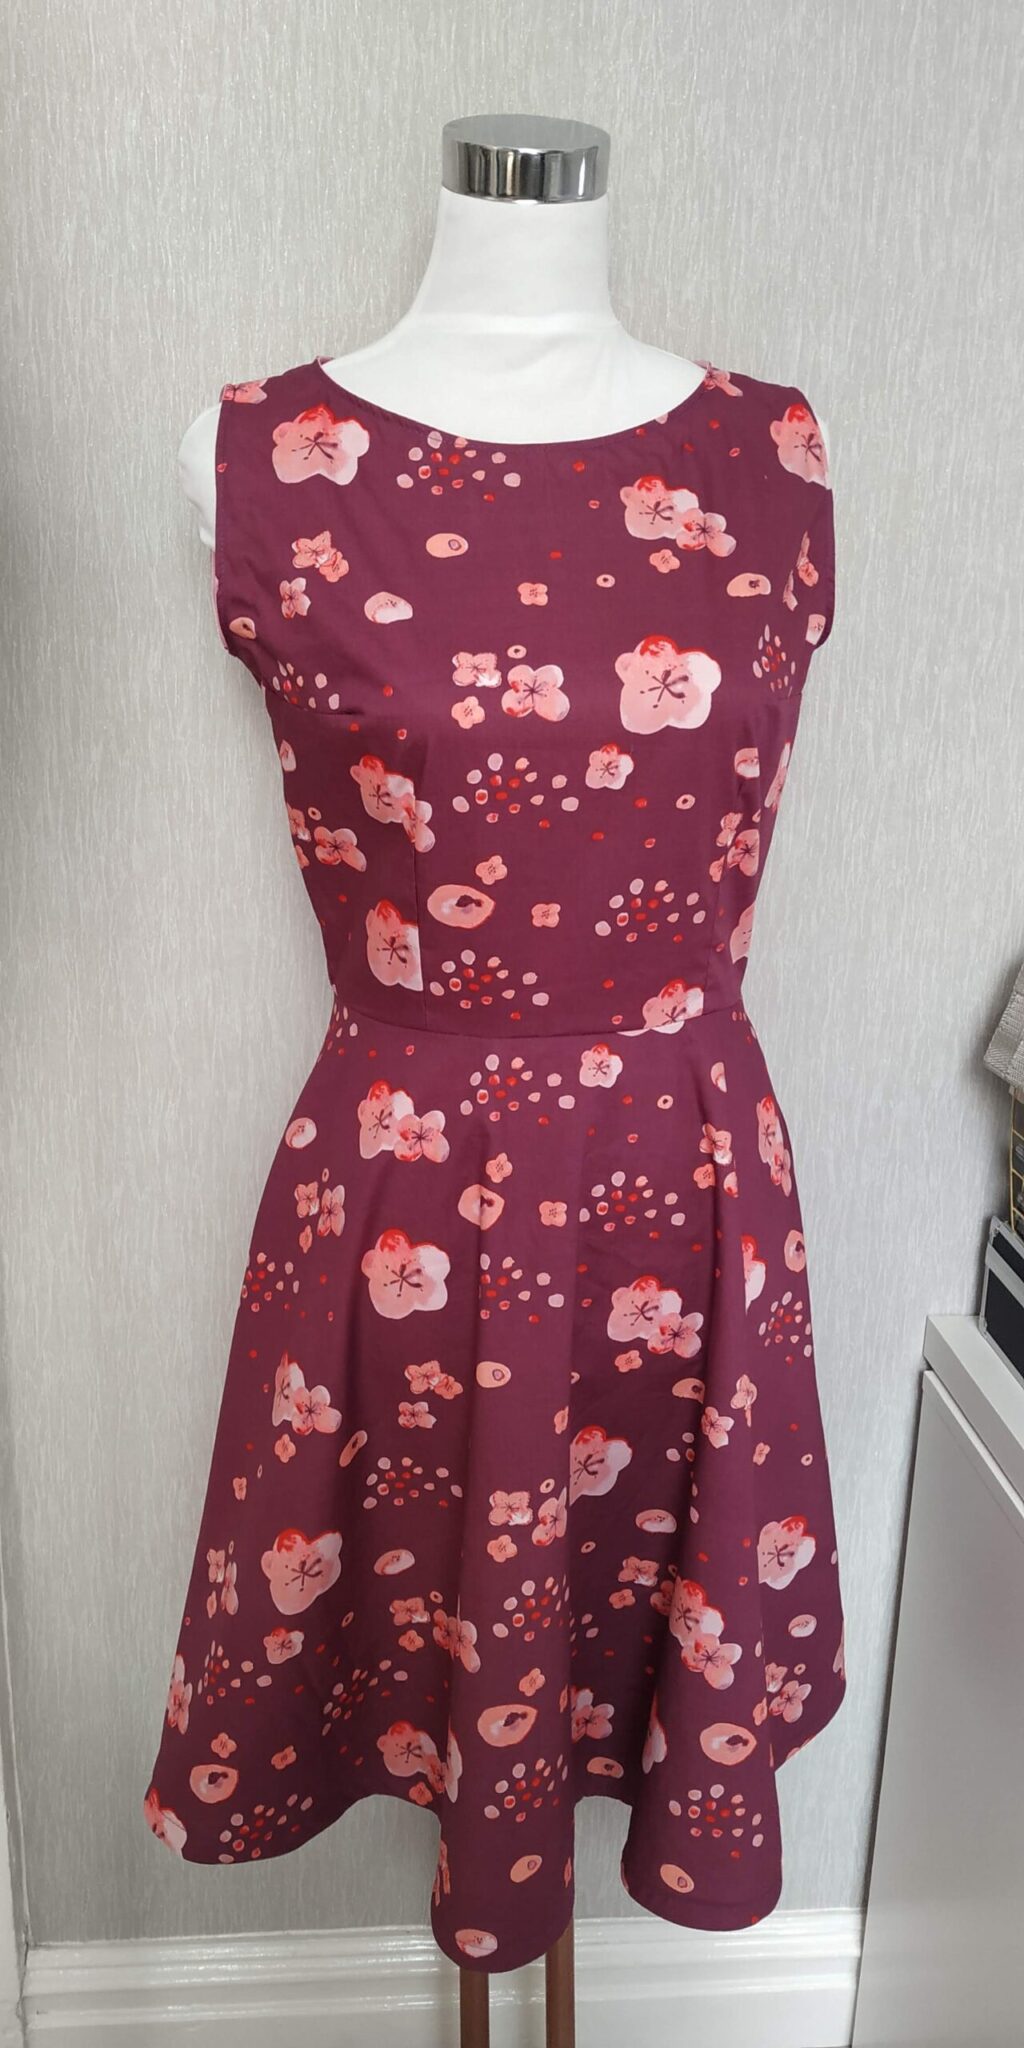
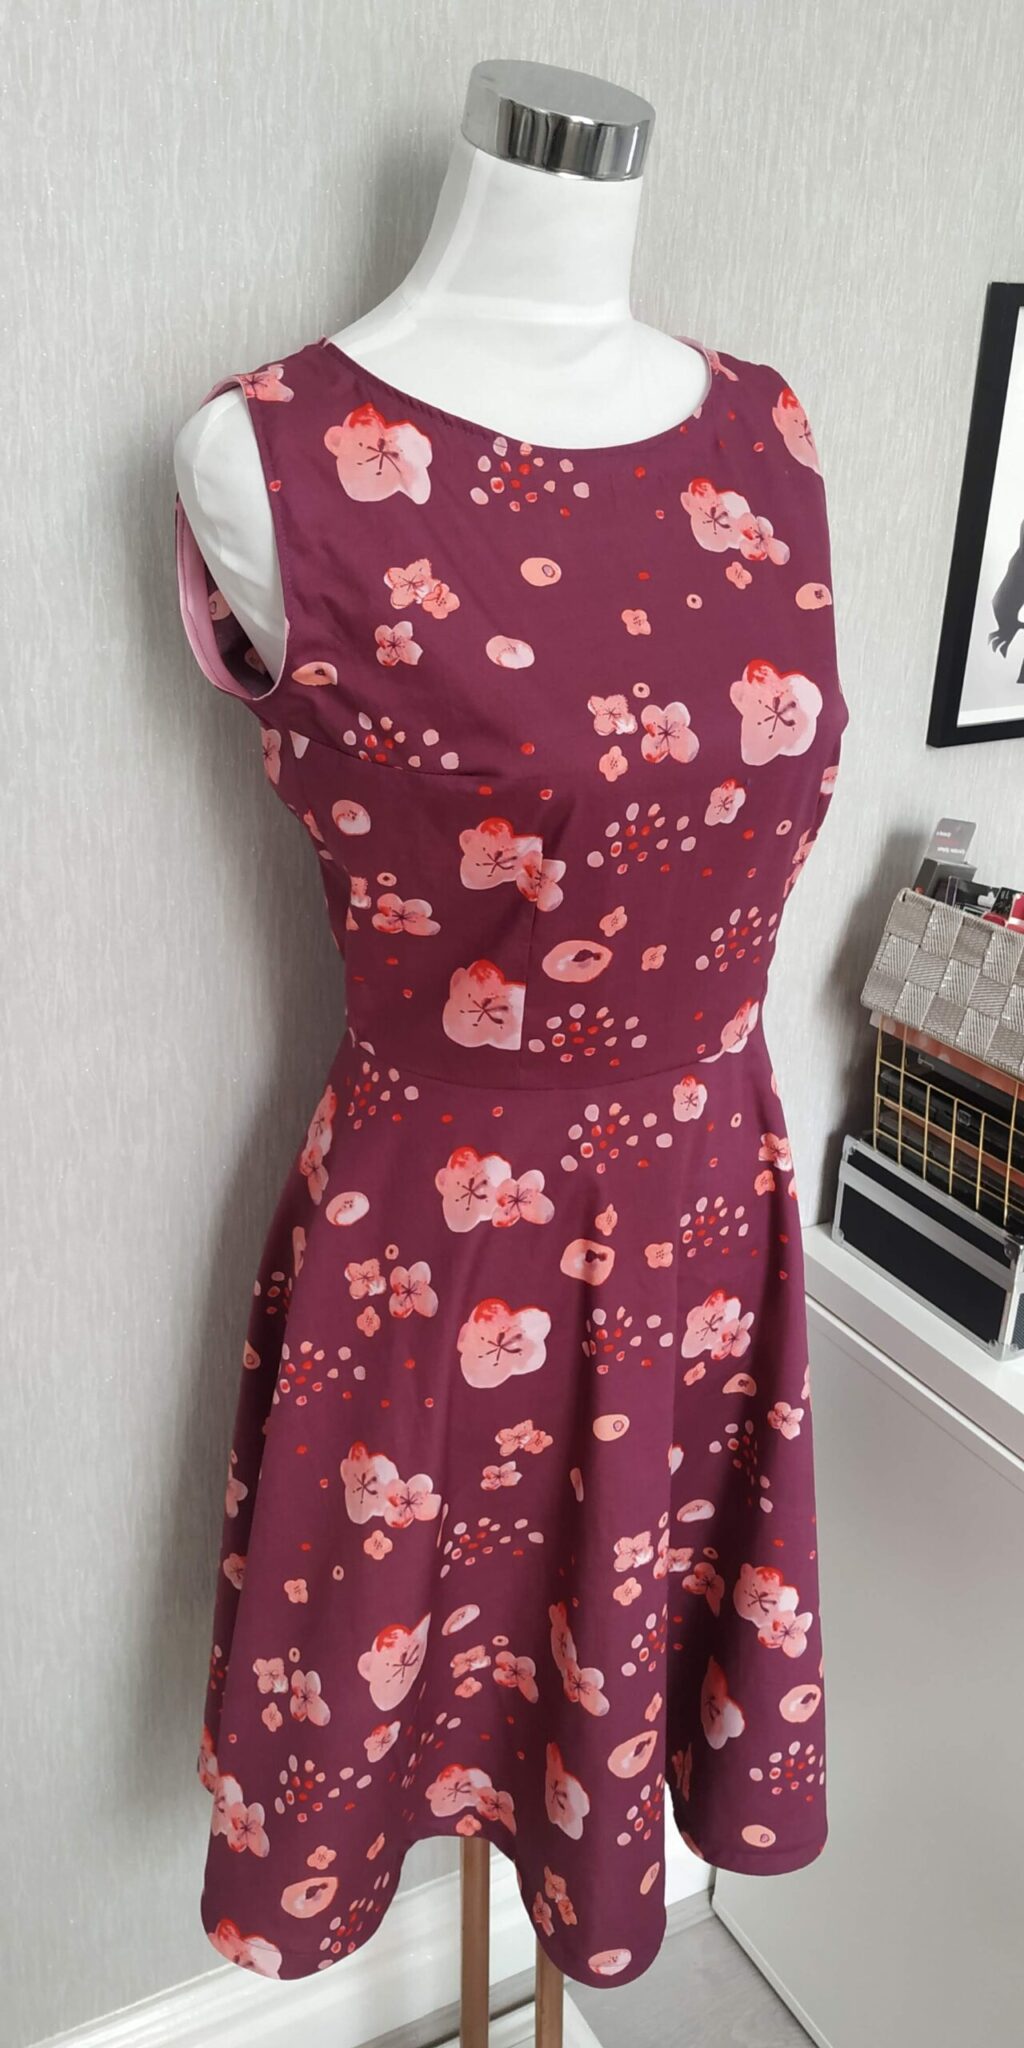
Do you like this dress? Download this pattern and many others in My Etsy Shop. They all come with instructions, printer friendly pages and step by step tutorials. Below some of the lovely photos by Jim Donnelly. Check my tutorial to make a petticoat to get that 50s look!


Do you like my posts? Remember you can support my blog in many ways, using my affiliate links, buying me a Ko-fi, or visiting my Cosplay Store! Following me on my Social Media and sharing my posts helps too! With your help I can create more cosplays, articles and tutorials to share with you!